
The second chapter in Machinika: Atlas is even more challenging and interesting than the first one. But the increased difficulty level also means more chances to get stuck.
I’m here to help again, by sharing the full Machinika: Atlas walkthrough for Chapter 2, First Contact. I have a step-by-step guide to everything in this chapter, including puzzle solutions with text instructions and screenshots. Let’s get this started!
NOTE: This walkthrough is for the mobile version of the game, so some mechanics are a bit different (no walking, and taping instead of clicking). But all the solutions for the puzzles are ultimately the same, so it doesn’t matter on which platform you play.
Machinika: Atlas – Chapter 2 First Contact Walkthrough
1. After completing the first chapter, you still have to do a bit of walking. Walk down the corridors, open and go through the first two doors until you reach another corridor with paintings on the left and a sky view to the right.
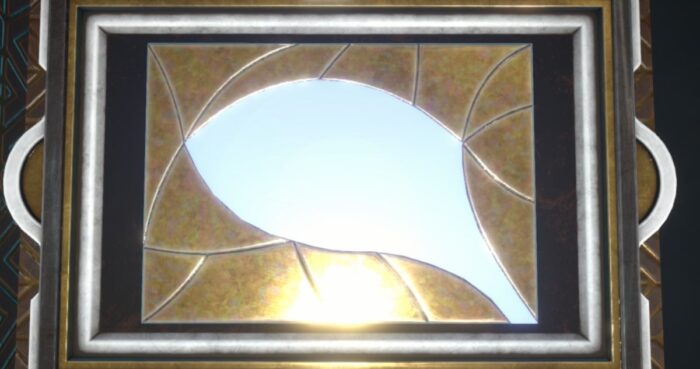
2. Get the second Letter by looking at the second set of paintings, to the left of the door at the end of the hallway.
3. Look at the panel in front of the paintings to notice the highlighted symbols. Then walk back to the first panel near the entrance door and re-create the shape, as seen below:
4. Now you will notice a loose screw on the stairway and automatically unlock the Magnetic Screwdriver. Drag it over the loose screw and tighten the screw. It’s a more time consuming minigame that you play in two parts.
5. Here’s how to complete the screwdriver minigame:
- First, rotate the bottom part of the screwdriver to get 3 triangles. Then, use the middle one to bring it up front, on the same level as the hologram. Finally, rotate it using the first button.
- When done, tap the yellow switch to move to the other shape. Do the same – create 3 shapes and place them in the right spots (this time, you will have to rotate them counter-clockwise, in the opposite direction you used with the triangles).
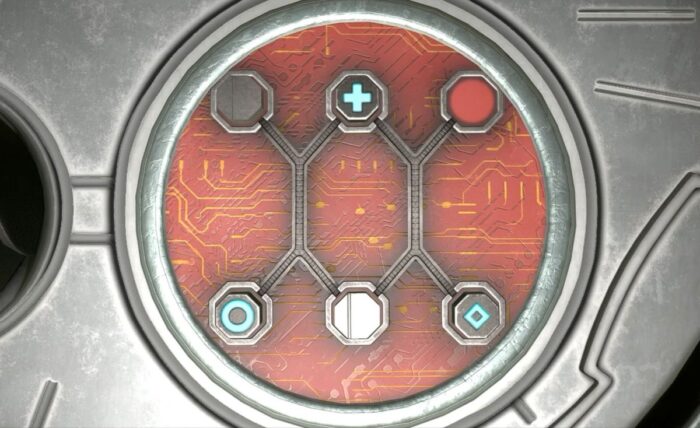
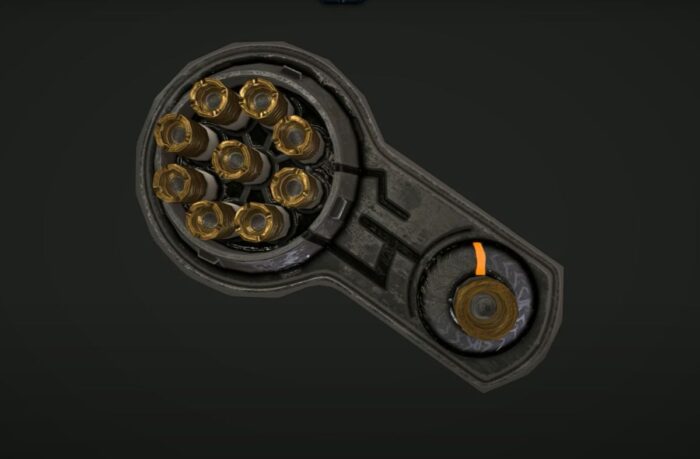
6. This will actually take you to the beginning of the second chapter! Zoom in to the sphere to the left and use the Screwdriver to open it. It’s time to solve the screw-based puzzle, as seen in my screenshot below:
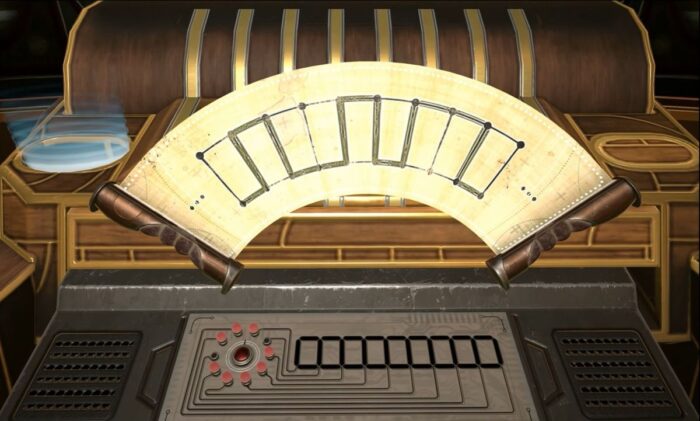
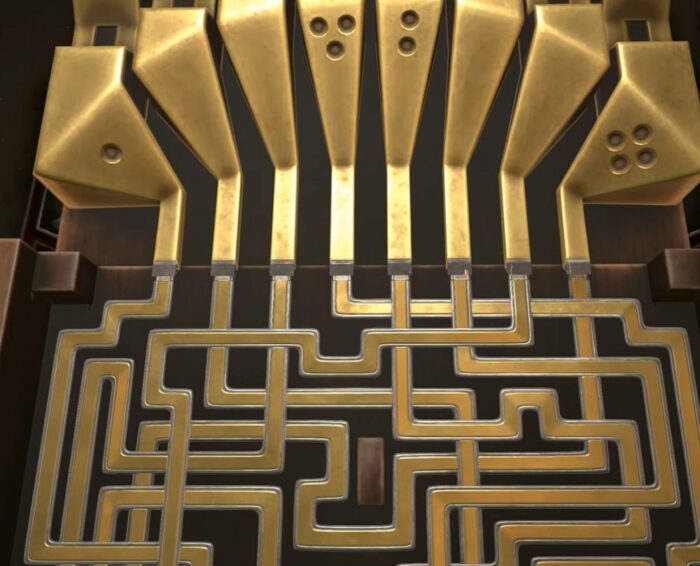
7. Place your walkie-talkie in the unlocked spot on the console. Open the scroll behind it to start working on the WiFi signal puzzle. The idea is to match the lines with those on your device. Here is the solution (instructions on how to do it below, based on my markings):
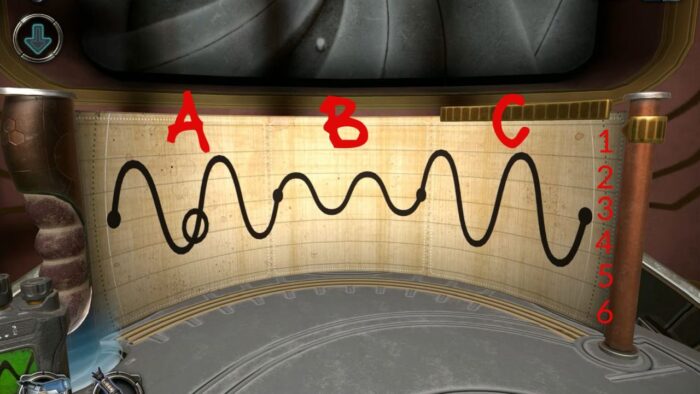
8. To solve the puzzle above do this:
- with the top bar on A spot, move right ring at level 2
- move top bar in B spot, and drag the ring at level 5
- move top bar in C spot, and drag the ring at level 1
- IMPORTANT: Always make the moves after the signal’s circle leaves the area you’re working on.
For a similar game, check out the articles below:
9. Pick up walkie-talkie (we still need more signal power) and place it in the newly opened spot on the console opposite the one you solved the puzzle on.
10. First, drag the console’s command center from the middle of the desk. Then tap and move to the right the large button on the top left side of the console. The scroll shows you the solution for the next puzzle:
11. But we need to do some other things before being able to solve it. First, zoom into the area behind your walkie-talkie and press the button. Drag all the wooden items on each row to the left and right until you fully reveal the red bar:
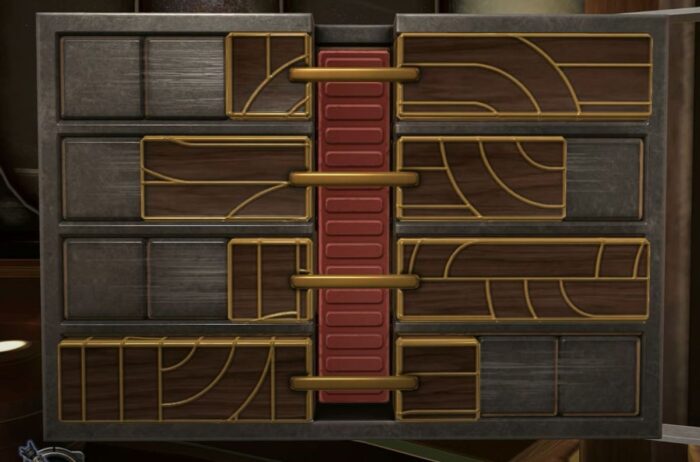
12. Drag the red bar upwards and get the lightbulb.
13. Move to the right side of the console, the column opposite the one that’s holding your walkie-talkie. Use the Air Duster to clean it first, then rotate the moon symbol so that you reveal the piece below. Tap it and it will reveal a mechanism in the column – drag its handle.
14. Now, you have revealed a massive organ-like structure/maze. We’ll get to it later too. Now, zoom in the area near the right column, on top, and press the button. We have a similar puzzle to the one on the left, but a bit more complicated:
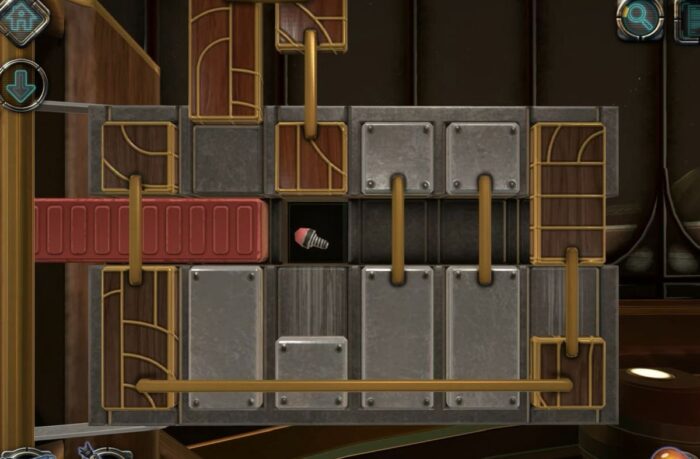
15. Here is how to solve it:
- Drag up the large items to the left and right extremities, then drag the red bar to the right.
- Move the other two wooden symbol upwards and drag the red bar all the way to the left.
- Drag the large items that control the left and right wooden pieces (the first you moved) back down, and then drag the red bar all the way to the left again. Get the second lightbulb.
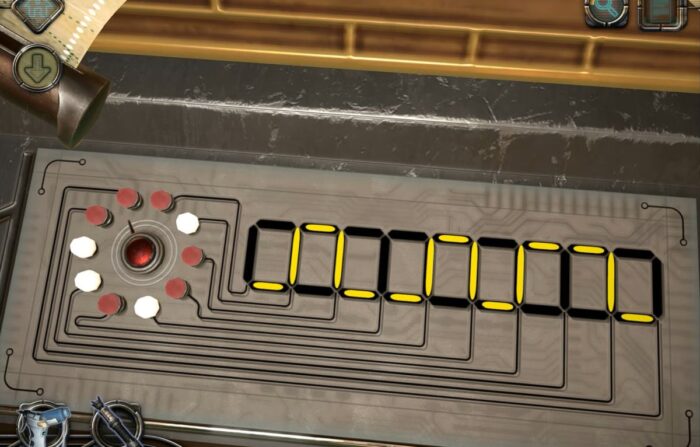
16. Zoom into the console in the middle of the screen and add the two lightbulbs to the left side, in the missing spots.
17. Now, looking at the pattern above, we have to replicate it below. You can check it out in my screenshot above (at walkthrough step #10), or look up in your game to see it.
18. If you don’t want to go through all the trial and error, here is a screenshot with the correct lightbulbs to press:
19. A new drawer will open, and a key will be dropped. Pick up the key from the floor.
20. Zoom into the key and first rotate the bottom part of it so that the line faces the bottom handle area. Then drag the connector thing that is bent back in shape, so that the key looks like this:
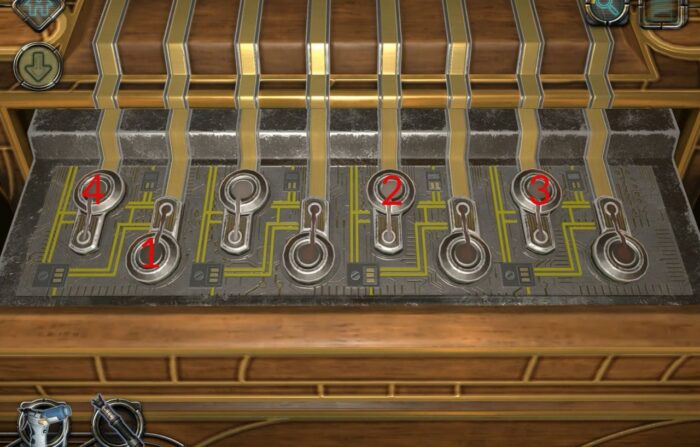
21. Now zoom back into the newly opened console part and place the key in the empty spot. The mother of all mazes seems to be there, but it’s actually a simple puzzle: we need to press the correct keys to activate the indicated pipes:
22. If you don’t want to follow the lines yourself, I am marking below which buttons to tap:
23. Grab your walkie-talkie and move into the elevator thingie, then place your device on the column there. When it pops up, drag the handle to move to a new level.
24. First of all, I recommend rotating about 180 degrees to take Letter #3. Then turn back around and zoom into the visor-like item.
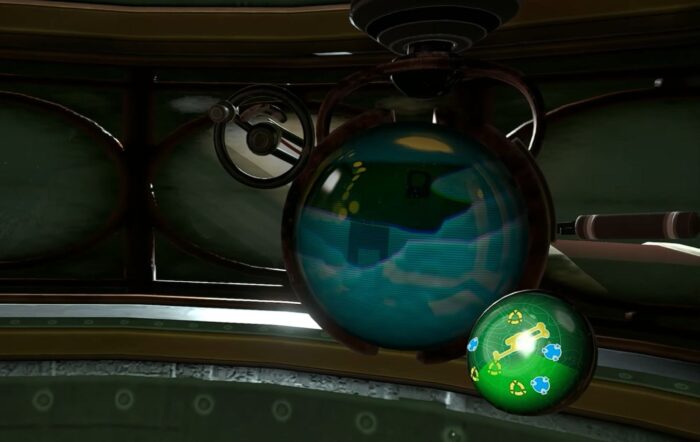
25. Here is how it works: the green screen is the radar, showing you the signals. The lighter shade of green shows you the direction you’re looking. The handle controls the height of your scope; the wheel is used to rotate your scope. Your goal here is to find, on the larger screen, all the symbol emitters.
To solve this puzzle, you simply have to rotate the scope until the light green area is covering one or more signals. When that happens, use the handle to drive it up or down, until you see the required signal, as seen below:
26. Go down with the elevator and have a chat on the walkie-talkie. Then use both doors to exit until you reach the closed one. When you do, zoom into the vent area near the door.
27. Use the screwdriver to open it, then get into the ventilation system. You get a puzzle in which you will need to place each colored bar into the similarly-colored holder:
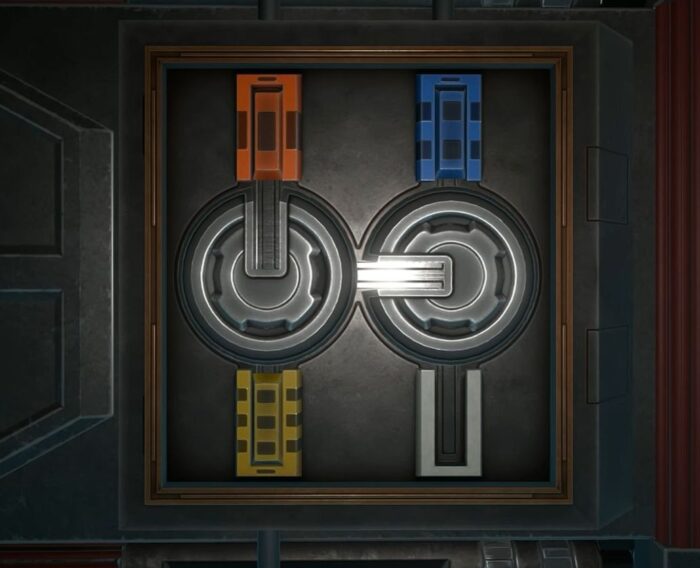
28. Here are the step-by-step instructions on how to do it:
- Drag the red bar down. Rotate the right wheel and drop the red bar in the white holder.
- Get the blue bar from the left, pass it over to the right wheel, and put it in its holder.
- Use the left wheel to get the yellow bar and move it down.
- Use the right wheel to transfer the remaining red bar into its correct holder.
29. You will continue down the vent until you find a closed lid. To open it, drag the handles down, then towards the middle (the red button), and finally press them so they’re opposing each other. Then, rotate them to match the second set of lines, drag the handles up again, and move them to the sides. Rotate the button and exit
And another chapter is complete! If you still haven’t done the previous one, I recommend checking out my Machinika: Atlas – Chapter 1 here. Or, if you need help with the next chapters, read my Machinika Atlas Chapter 3 walkthrough here or the Chapter 4 walkthrough.
For all the walkthroughs published on this website, check out the Walkthroughs Index.
I also recommend checking out another great mobile adventure game (and its full solution) below:
- AE Mysteries: Canine Cases – Chapter 4 Walkthrough
- AE Mysteries: Canine Cases – Chapter 3 Walkthrough
- AE Mysteries: Canine Cases – Chapter 2 Walkthrough
- AE Mysteries: Canine Cases – Chapter 1 Walkthrough
Or, if you’re already getting headaches from the intense difficulty (I sure got one!), you can relax a bit by checking out the games I listed on my list of 30 Super Cozy Games to Play Today.