
We’re continuing our adventure through Machinika: Atlas, with the third chapter. Today, I have the full solution for this chapter, which manages to be even more fun and challenging than the previous two.
I’m here to help again, by sharing the full Machinika: Atlas walkthrough for Chapter 3, Artificial Intelligence. I have a step-by-step guide to everything in this chapter, including puzzle solutions with text instructions and screenshots. Let’s get this started!
NOTE: This walkthrough is created from playing mobile version of the game, so some mechanics are a bit different (no walking, and taping instead of clicking). But all the solutions for the puzzles are ultimately the same, so it doesn’t matter on which platform you play.
1. Look at the planets behind you and get the Seal from there.
2. Go all the way towards the right staircases and pick up the next letter.
3. On the wall opposite the column where you found the letter, there is a red symbol with planets. Tap it to reveal a hidden compartment, then move the lock to the left and pick up the drone.
4. Drag the drone into the indicated compartment and complete the minigame, having the drone activate the red button. Grab the controller before leaving the area.
Also read: Halloween Stories Games in Order
5. Move down the stairs and look behind the round table you were facing at the beginning of the level and zoom into the right side. Drag the red button downwards, then solve the puzzle. The idea is to have all the red pieces in the middle:
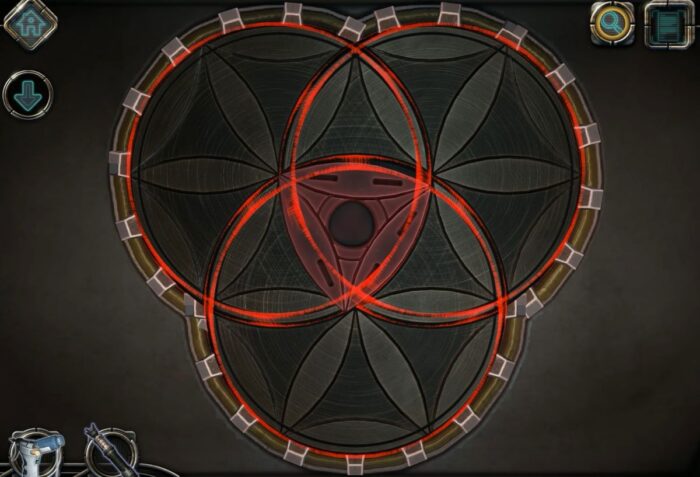
2. Here is the solution for the puzzle, if you don’t want to do it yourself (there are different approaches that work though):
- bring the bottom piece from the bottom circle into the existing red piece.
- rotate the right circle until the red piece fits into the upper left part.
- rotate the left circle until the other red piece fits into the ones in the right circle.
- rotate the right circle once to the right, to bring the large set of pieces into the left circle.
- rotate the left circle twice to the left, so that both the large set and the remaining red piece are in the upper left corner.
- rotate the right circle, so that the red piece is moved to the bottom of the right circle.
- rotate the left circle once towards the right
- bring the piece from the right circle into the set of pieces, then move the left circle ones to bring them all in place.
5. Go back to the starting point, and go down the stairs, then press the red button on the chair to the right.
6. Zoom into the controller thingie on the desk and look at the position of the planets (screenshot below). You will need to zoom in on the Seal you got and match the placement of the planets:
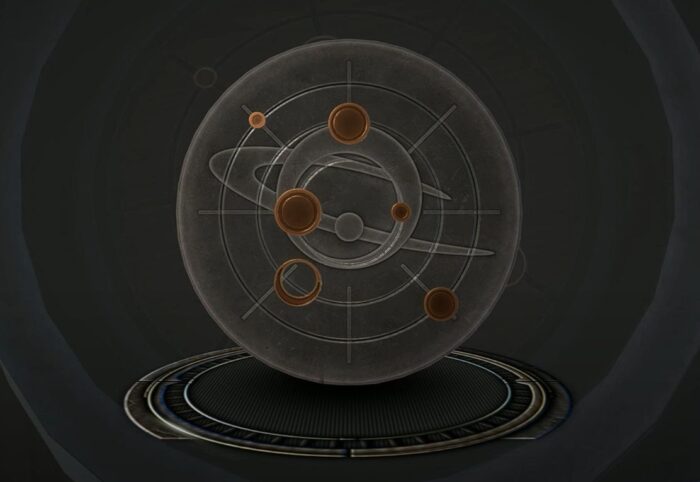
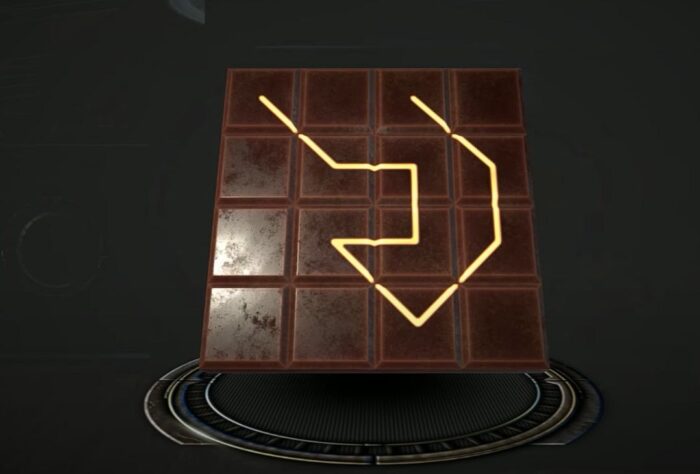
7. Place the Seal in the spot with the planets and pick up the Grid. Zoom into the grid and complete the puzzle – here is how the image should look like:
Also read: Edge of Reality Games Listed in Order
8. Zoom into the screen to the right of the console and place the grid into the spot on the left. Another puzzle to solve! You do it by tapping the squares that match the ones with a line on them on the grid.
9. After the large sphere appears, zoom into the left side area of the table and put the drone in the socket there. Navigate the drone following my instructions:
- Go forward until you hit the wall, then turn left
- When you reach the fork in the road, go left and use your drone to deactivate the red lasers.
- Move forward until you see the red button and activate it as well.
10. The arm retracts. Zoom into the sphere and remove its lid by first dragging the handles all the way to the left and right, and then by dragging the remaining four buttons to the left and right. Finally, drag each of the wheels to the left of the sphere to the left to fully unlock it.
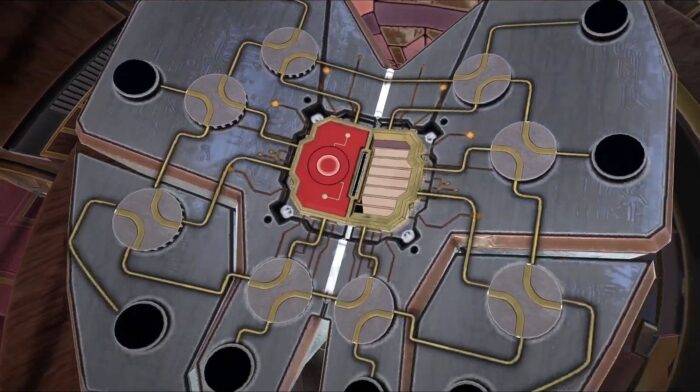
11. Place the battery from your inventory into the middle of the new puzzle. Your goal here is to power up the battery by making sure that you have a direct connection between all black circles.
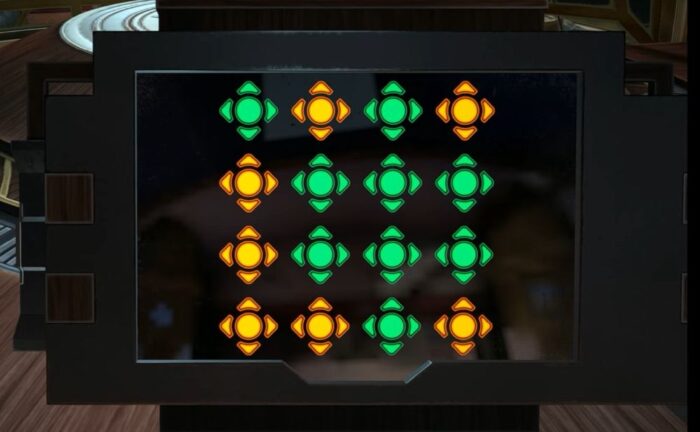
12. Tap each of the circles with lines on them until they match the positions in my screenshot below. When they do, tap the red button to activate them:
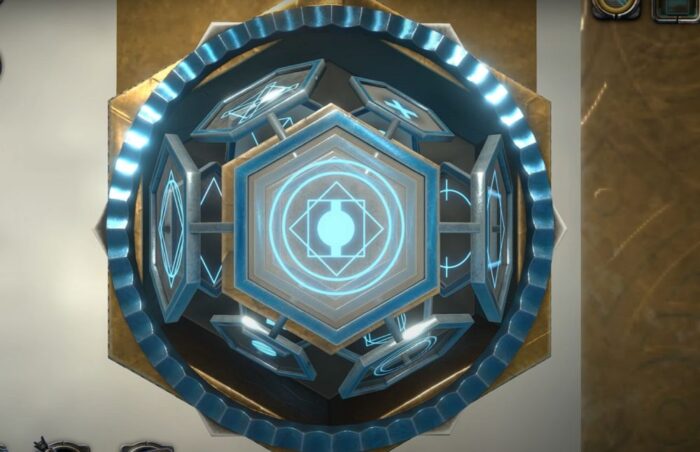
13. A hologram will appear. Simply drag all the pieces into the middle. Now you can go through the doors on top of the stairs.
For another popular room escape adventure, check out my Rooms & Exits walkthrough hub.
14. We’re back to the main hallway. First, zoom into the panel to your left and pick up Letter #5. Then move to the other panel and pick the mechanical part.
15. Go to the door on the left and place the mechanical part in the handle area to the left of the door. Solve the key lock puzzle there to match the shape shown when you rotate the handle. This is how it should look like:
16. Enter the elevator and tap the buttons: top left, bottom left, bottom right, and middle right. Exit the door and you’re ready for the new chapter!
And Chapter 3 of Machinika: Atlas is complete! If you want to check out the previous ones, I have the links to the articles below:
Don’t forget to check back soon for the rest of the chapter walkthroughs. I have already published the Chapter 4 walkthrough for Machinika: Atlas. And if you still have questions regarding specific puzzles or solutions, let me know by commenting below!
For all the walkthroughs published on this website, check out the Walkthroughs Index.