
This is the ultimate walkthrough for Strange Antiquities. It covers every artifact, clue card, vault puzzle, and achievement so that you get them all in one run, including the most difficult, not using any hints (the Master Thaumaturge achievement).
So, if you either got stuck while playing, or if you want to quickly go through all the days in the game just to follow the story and not worry too much about everything else, this walkthrough’s got you covered. It’s going to be along one, but I’m sure you will find it useful.
Before we start, here are the golden rules to keep in mind and the essential tools you will use in the game (and how you’ll use them):
| Tool | Purpose | Tip |
|---|---|---|
| Strange Objects | Main artifact index; use Contents – entry for item info | Always check both text & sketch |
| Hermetic Symbology | Decodes sigils, planetary metals, and imbuements | Key for “wisdom”, “protection”, “thunder”, etc. |
| Gemstones Compendium | Confirms gem types & meanings | Colour + lore = verification |
| Book of Curses | Late-game cures | Cross-reference curse symptoms |
| Senses | Sight / Touch / Sound / Perception / Colour & Composition | Stack clues: material + emotion = truth |
| Scales + Weights | Verify 1 lb / ½ lb objects | Keep 1 lb handy for Evocant tests |
| Thaumic Lens | Reveals field types (Mentic, Diurnic, etc.) | Unlocks after table-tile puzzle |
| Resonance Compass | Detects Resonant artifacts | Used for the third vault |
| Exploration Map of Undermere + Gleaston Castle + Catacombs | Story progression & hidden objects | Follow numbered keys in guide |
IMPORTANT! Do not press the “Hint” button – not even once – during this playthrough. If you do, you won’t get the Master Thaumaturge achievement. You have all the hints and advice you need in this walkthrough not to have to press it.
With all these cleared out, let’s begin the Strange Antiquities walkthrough!
Day 1
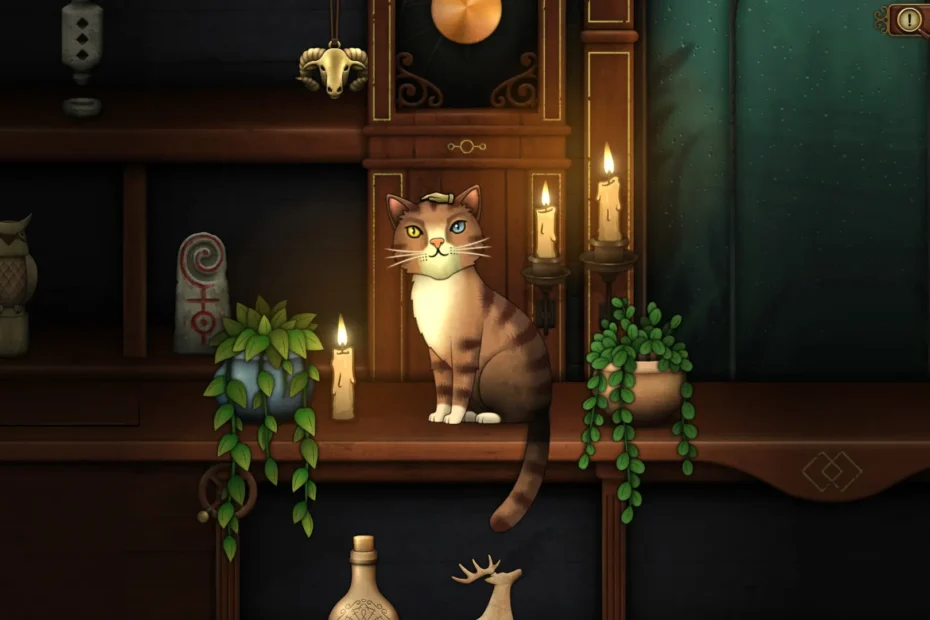
You begin inside Strange Antiquities with Eli White introducing the store. Before ringing the bell, grab two quick achievements tied to your cat:
– Feline Priorities: Pet Jupiter 30 times.
– Mask of Jupiter: When he’s sitting upright on the counter, place the mask from under the counter onto him.
Opening Tasks
- Talk to Eli White – receive Strange Objects (the artifact index).
- Search the desk drawers beneath the counter:
- Upper left – first wooden tile + note about cellar stash.
- Middle left – magnifying glass + note on Thaumic Fields.
- Right – two curios + map of Undermere – unlocks Explore button.
- Explore – Boatyard (#8) – story event + pages (Sleep Vessel & Shinn).
- Explore – Unmarked buildings (#29) – find three shop items.
Customers & Identifications
Thomas Pope – Hunter’’’s Boon
- Clues: “Trophy from slain beasts,” “power of the predator.”
- Look: Tooth on left-middle shelf.
- Confirm: Use Inner Perception – sense of predatory strength.
- Reward: Business as Usual achievement + unlock Selenic Totem entry.
Jack Hungerford – Shadow Hold
- Optional Achievement: Give wrong items until sanity gets to 0. Then, play dice mini-game, win – Sanity Restored.
- Clues: “Container” + shadow-catcher pattern.
- Look: Jar on lower-right shelf, right of bell, marked with the same symbol.
- Reward: Unlock Sun Bond entry.
Stanley Hume – Ossic Ring
- Clues: “Macabre,” “hissing sound.”
- Look: Bone artifact above Shadow Hold.
- Confirm: Use Sight & Sound – audible hiss.
- Reward: Unlock Evocant entry.
Edmund Bishop – Voice of Cernunnos
- Clues: Bronze neck ornament worn by the horned god.
- Look: Upper-left shelf torc.
- Confirm: Colour & Composition – bronze.
- Reward: Unlock Spirit Eye entry.
End-of-Day Events
- Close shop – first dream story – trace handcuff symbol.
- Receive first Clue Card (“escaped prisoner … north-west”) – sets up Day 2.
Day 2
Clue Card: Escaped Prisoner
Card text: “An escaped prisoner ran north-west. He hid me in the first building he came to.”
The handcuff symbol confirms the Old Jail (#10) reference. Move one building directly above it and find the hidden artifact to earn the Explorer achievement.
Morning Visitors
Verona Green
Gives you Hermetic Symbology, unlocking the ability to decode sigils, planetary metals, and imbuements. You’ll rely on it constantly from now on.
Tess Sherwood – Horned Shackle
- Clues: Antlered form; horns rubbed smooth with use.
- Find: Right-middle shelf – wooden deer totem.
- Confirm: Sense of Touch – rough body, smooth horns.
- Result: Give it to Tess – gain Vessager entry.
Mail: David Chafer
Delivers a note from farmer John Royston. Travel to Royston Farm (#30) to collect another strange object for your shelves.
Julia Braddock – Moon Heart
She asks for “Moon Heart,” a phrase absent from your Contents but listed in the Index which points to Selenic Totem.
- Clues: Carved, crescent shapes, evokes love or warmth.
- Find: Owl totem (upper-left shelves).
- Confirm: Inner Perception – warmth + joy.
- Result: Give to Julia – unlock Holgen Grimm entry.
Daisy Winters – Moral Choice
She wants a charm after a falling-out with her friend. You can give Binding Seed or Zeah. Here’s what each choice will do:
- Binding Seed: Mixed wood + stone, spiral enclosing a seed – wood spiral necklace on upper-right shelf.
- Zeah: Bronze ram’s-head pendant; single metal; induces paranoia.
- Your choice doesn’t affect achievements, but Edith Moore will later reference whichever item Daisy didn’t receive.
Label both before choosing; giving either unlocks Shield Charm entry.
Edwin Burrows – Libula
- Clues: “Imbuement of wisdom,” strong symbology.
- Process: Open Symbology – Imbuements – Wisdom symbol.
- Find: Pendant next to Binding Seed, marked with Wisdom rune.
- Result: Give it – gain Witch’s Finger entry.
End the day to receive the next story fragment and Clue Card.
Day 3
Clue Card: Block Outline
The card sketch mirrors a building cluster south of “Prince’s Street.” Click the block directly under the word Prince’s and obtain two new artifacts.
Visitors
Francesca Robertson – Evocant
- Clues: Stone, weighs 1 lb.
- Find: Stone idol on lower-left shelf.
- Confirm: Use scales with 1 lb weight – balance.
- Reward: Unlock Daedalus Link.
Temperance Parker – Shield Charm
- Clues: Charm of protection – must bear Protection symbol.
- Process: Symbology – Imbuements – Protection icon.
- Find: Lower-left pendant beneath caged area, matches symbol.
- Reward: St. John’s Anvil entry + Apprentice achievement (10 items identified).
Hugh Langston – Map Clue
Shows a church sketch – Undermere Church (#28). Follow lake north; click building beside it for two new objects (one secret).
Verona Green – Vessager
- Clues: Flames burn pale blue.
- Find: Lower-left artifact with colored stones + diamond-shaped hole.
- Test: Hold near candle – flames turn blue.
- Reward: Moonstone Guardian entry.
End the day for more story and a new Clue Card.
Day 4
Clue Card: “Behind Locke and Key”
Open Undermere map and note Locke House (#7) beside Keystone Manor (#13). Click the open lot south of both to uncover a new artifact.
Visitors
Eli White
Drops by with a short check-in and gifts you another curious item.
Edith Moore – Personal Change
She asks for something that can overcome inner demons. Consult the Index and “Change” links to Horned Shackle and Libula.
Horned Shackle’s entry fits best (“binds and frees the will”). Give that to her – no new entry but affects dialogue later.
Francesca Robertson – Sleep Vessel
- Clues: Six points; contains trapped nightmares.
- Find: One of the original desk-drawer artifacts – six-pointed shape.
- Confirm: Inner Perception – darkness inside.
- Reward: Resonance Compass entry.
Althea O’Shea – Silent Breath
- Clues: Holds a token from a white stag; heightens senses.
- Find: Jar with white hair in blue liquid (right shelf).
- Confirm: Colour & Composition – white hair; Perception – alertness.
- Reward: Elva Stone entry.
Rufus Shelley – Daedalus Link
- Clues: Light, flight-themed.
- Compare: Bat vs raven pendants – raven lighter.
- Reward: Cussic Purifier entry.
Edmund Bishop
Provides Gleaston Castle map + letter. Follow his note’s route (Ground Floor – Grand Hallway – stairs – left corridor – upper-left room with Thaumic symbol).
Collect a new artifact and the Gemstone Compendium. This opens the Castle exploration phase for future Clue Cards.
End the day for another story segment and a new Clue Card.
Day 5
Clue Card: Paper Cutout Overlay
The card has a cut-out window; overlay it on the Gleaston Castle map. The outline matches the room below the Library, lower-right of the map. Click it and gain a new artifact.
Visitors
David Chafer – Mail
Brings a letter mentioning “The Triangle” and a clearing in the center. Open Undermere map – Heath Wood (#6) (triangle of trees). Explore and collect three new artifacts.
Gus Foley – Orford Spire
- Clues: Submerged in goat’s blood, two horn-like points.
- Find: Lower-right shelf, dark cauldron-like piece with red stains.
- Confirm: Colour & Composition – blood traces.
- Reward: Amphisian Talon entry.
Eli White – Guise of Lillian
- Clues: Fossilized remains; induces out-of-body feeling.
- Find: Right-middle shelf, stone with fossil on top.
- Confirm: Colour & Composition – fossilized; Perception – dizzy.
- Reward: Tenebran Cloak entry.
Rebecca Rose – Choice 1: Aries Remnant or Spirit Eye
- Aries Remnant: Black pendant with purple gems in Aries constellation pattern.
- Spirit Eye: Pendant with heat + cold symbols, dark-green gem (Malachite). Confirm via Symbology + Gemstone Book.
Aries Remnant gives a “lighter” ending path. Spirit Eye keeps Rebecca alive and useful later. Label both, hand over one – unlock Sithean Charm entry.
Clarence Hawker – Sun Bond
- Clues: Warm, non-precious metal, gem of light.
- Find: Bronze pendant with orange gemstone (Amber).
- Confirm: Touch – warmth.
- Reward: Cyrene Ward entry.
Audrey Bell – Holgen Grimm
- Clues: Worn mask of death priests; Viviane gemstone (death/decay).
- Find: Mask once used for Jupiter’s achievement.
- Confirm: Gemstone Book – Viviane = death.
- Reward: Lead Heart entry.
End the day to continue the story and get a new clue card.
Day 6
Clue Card: Gleaston Castle Note
Follow instructions carefully: “Left again” applies only at the hallway end. Click the room upper-left of the first-floor spiral staircase to get a new artifact.
Visitors
Helena Appleton – St. John’s Anvil
- Clues: Leaf pattern matches sketch; muffles sound.
- Find: One of the drawer artifacts below counter.
- Confirm: Sound – muffled.
- Reward: Grey’s Grace entry.
Barton Potter – Elva Stone
- Clues: Selenic (Moon) metal = Silver.
- Find: Stone with two crescent-moon shapes (silver).
- Reward: Barton gifts another artifact.
Verona Green
Stops by briefly, adds Ambra page to your book.
Frances Mason – Cussic Purifier
- Clues: Small item placed in vinegar; bottle with cross label.
- Find: Green liquid bottle, symbol = vinegar (check Symbology).
- Confirm: Sound – rattle inside.
- Reward: Valent entry.
Simone Green – Researcher
Brings note about a hidden alcove below the counter: “Place Horned Shackle, Evocant, and something moon-related.”
So this is what you must do: Place Horned Shackle + Evocant + Selenic Totem –
door opens to Secret Alcove Vault #1 and you get four new artifacts + two more wooden tiles.
Store tiles back in drawer for later.
Jim Wolfe – Hearing Charm
- Clues: Animal known for hearing.
- Find: Bat pendant (upper-left shelf).
- Confirm: Sound – everything amplifies.
- Reward: Veiled Phenn entry.
End the day to continue the story and get a new clue card.
Day 7
Clue Card: Tower and Trees
Refers to Galfrey’s Tower (#22); statue there points east so follow line to Mossy Wood (#21) and obtain new artifact.
Visitors
Verona Green – Letter from Anna Bryant
Her note leads you to Naylor Island; sail north to the row of four houses and click the second from left. Chest opens only to “the Voice” – use Voice of Cernunnos to get a new artifact.
Lester Crowley – Lead Heart
- Clues: Depicts Cernunnos in non-human (stag) form; heavier than looks.
- Find: Deer statue with antlers.
- Confirm: Use 2 lb weight – still heavier.
- Reward: Corvan’s Might entry.
Angus Eaton
No request – drops off a mechanical device. Keep it; it’ll unlock the drawer later.
Eli White – Sithean Charm
- Clues: Wooden base + planetary metals; plant motif; reacts to weather.
- Find: Pendant with two metal leaves (gold & silver).
- Confirm: Touch – warm & tingly during rain.
- Reward: Diverging Hook entry.
Francesca Robertson – Choice 2: Restful Mether or Witch’s Finger
- Restful Mether: Cup with dark-purple (Iolite) gems; calming energy.
- Witch’s Finger: Yew-wood totem with Witchcraft rune. This is the better option for a better outcome later in the game (Jack recovers).
- Reward: Bonesguard entry.
Rebecca Rose (optional)
If you gave her Aries Remnant earlier, she revisits to thank you. If not, she doesn’t.
End the day so that the story continues, and a new clue card arrives.
Day 8
Clue Card – Half a Note
Overlay the sketch on the Gleaston Castle map. The marked tower is the eastern (sunset-facing) one – lower-right on the map. Click it to get two new artifacts and half of a torn note (keep it safe).
Visitors
Francesca Robertson – Selenic Totem
She simply wants “wooden totems.” Give her the owl-shaped Selenic Totem again to progress her storyline.
Verona Green – Tenebran Cloak
- Clues: Bronze with a single gem that “summons darkness.”
- Find: Statue of a woman with crescent-moon headdress.
- Confirm: Colour & Composition – bronze + pink gem; Gemstone Book – Moonstone = “enveloping night.”
- Reward: St. Cedric’s Thunder entry.
Barton Potter – Valent Request + Eli’s Note
This is a bit more complicated. First read Eli’s note: he hid a “book on curses” behind a counter compartment.
Use the mechanism Angus gave earlier: insert it beside the Holgen Grimm mask slot; press the matching petals until it fits. Drawer lifts – discover Book of Curses + a secret artifact and get the Burning Blood achievement.
Now fulfill Barton’s request:
- Clues: “Equal holes, pulsing focus.”
- Find: Tri-diamond object on left-middle shelf.
- Confirm: Touch / Perception – vibrates at top tip.
- Reward: Barton grants Catacombs map.
Bonnie Robertson – Choice 3
She believes Barton is cursed and wants Corvan’s Might to kill him. Whichever you choose, label both artifacts first. Options:
- Give Corvan’s Might: She attacks Barton, fails, flees.
- Give Grey’s Grace: She kidnaps Jupiter to blackmail you later.
No achievement loss either way, but the kidnapping route triggers an extra quest.
End the day now and receive more story and next Clue Card.
Day 9
Clue Card – Gravestone
On the Catacombs map, choose the second gravestone from left in the top row (“1688”). Click it and get a new pendant + Explorer II achievement.
Visitors
Constance Bader – Amphisian Talon
- Clues: Claw marks in sketch match artifact.
- Find: Piece with two severed fingers + razor nails.
- Reward: Morgan’s Folly entry.
Simone Green – Second Vault Hint
Hands you a diagram of three Thaumic Field waves for the plinths under the counter.
You can’t solve it yet as you need the Lens (today’s goal).
Francesca Robertson – Restful Mether
If you previously gave her Witch’s Finger, she now requests the Mether. Give it, you get no reward, but advances timeline.
Bonnie Robertson – Kidnapping Resolution
(Only if you denied her Corvan’s Might earlier.)
You find her in the forest behind Calgarth Hall #25. Choose one:
- Give Corvan’s Might: Same result – she fails & runs.
- Use Diverging Hook: Breaks her mind and you get a new clue: Jupiter’s aboard Mary Bell #23. Go there, rescue Jupiter and get the Catnapped, Not Forgotten achievement.
Wyatt Collings – Moonstone Guardian
- Clues: Comforting guardian; associated with Moonstone.
- Find: Cat statue from earlier chest.
- Confirm: Gemstone Book – Moonstone = guardian of dreams.
- Reward: Ascus entry + Unbound achievement (for curing curse).
Verona Green
- Clues: Protects against insanity; uses Protection + Insanity symbols.
- Find: Bronze object with central Insanity rune surrounded by 3 Protection runes.
- Reward: Fortinance entry.
Unlocking the Thaumic Lens
You now have all four wooden tiles from previous vaults. Place them into the pattern gaps under the counter – glowing center symbol.
Click to reveal the Thaumic Lens – Second Sight achievement. With the Lens active, match object waveforms to Simone’s sketch:
Left – Shadow Hold, Middle – Voice of Cernunnos, Right – Shield Charm. Vault #2 opens; collect one new artifact.
Audrey Bell – Veiled Phenn
- Clues: Bright color in light, clouds in dark.
- Find: Pendant with green eye.
- Test: Place in closed cabinet – clouds over after seconds.
- Reward: Witherance entry.
End the day to let the story progress and get a new Clue Card.
Day 10
Clue Card – Unmarked Grave
In the Catacombs, click the grave next to 1755 (marked moon above, cross beside) to get a new artifact.
Visitors
Katherine Walpole – Eye of Cernunnos
- Clues: Cernunnos’s own staff gem.
- Find: Tree-branch staff with central green stone.
- Reward: Zephyrim entry.
David Chafer – Letter
Points to a house north end of Ruskin Street (below #19). Arrive – overhear conversation – use Hearing Charm to spy and gain new object.
Grenville Pearce – Shimmer
- Clues: Slots into armor; calms rage; “stay one step ahead.”
- Find: Pendant with 6 slots + 3 gems.
- Confirm: Gemstone Book – Topaz (strength), Obsidian (fire), Malachite (sight).
- Reward: Babellia entry.
Freddie Lamb – Cyrene Ward
- Clues: Basilisk scales; protects against burns.
- Find: Pendant with 3 gems on leathery center.
- Confirm: Gemstone Book – Amber + Obsidian (fire stones).
- Reward: Solemn Mether entry.
He also gives you the final wooden tile (if you somehow missed one).
Vault #3 Unlocked
With the Lens active, use the newly glowing tabletop. Pattern the waveforms for Shadow Hold / Voice of Cernunnos / Shield Charm (from before). Second vault opens – collect new relic.
Note: If you did this on Day 9 already, it simply confirms the link.
Audrey Bell – Veiled Phenn Check-In
If not completed earlier, this repeats today; otherwise she thanks you and updates lore.
End Day 10.
Day 11
Clue Card – Silence Lies Beneath the Roots
Open the Catacombs map. The sketch matches the lower-right chamber with two tree-like carvings. Click it and collect an artifact shaped like a silver root bundle + new torn note half (joins the one from Day 8).
Visitors
Simone Green – Lens Calibration
She checks your Lens focus and hands you a diagram of concentric Thaumic Fields: Diurnic – Mentic – Umbric.
Hold the Lens over three shelf items until the waveform colors match the diagram:
- Hunter’s Boon – Diurnic (gold)
- Shadow Hold – Mentic (blue)
- Evocant – Umbric (purple)
A secret slot opens beneath the counter. Place all three inside and retrieve the Ethereal Key and the Key to All Doors achievement.
Barton Potter – Cursed Heart Investigation
If you spared him earlier, he returns weakened. Give him Fortinance to cleanse his mind and gain Cleansing Bell entry + “Barton Redeemed” flag (unlocks an alternate good ending).
Helena Appleton – Grey’s Grace or Bonesguard
She fears madness. You have two options:
- If you still hold Grey’s Grace, give it to her for a minor XP-style boost.
- If you don’t, Bonesguard works too but changes later dialogue. Both open Seraphel Mirror entry.
Audrey Bell – Curse Demonstration
Shows you a locked glass case under the shop stairs. Use the Ethereal Key – case opens – collect three cursed artifacts – Book of Curses adds pages automatically.
End of Day 11 Events
Combine the two torn-note halves – this reveals phrase “Bishop’s Square knows the truth.” Dream: faint whisper about “four lights and one shadow.” This sets up tomorrow’s puzzle.
Day 12
Clue Card – The Four Candles
Overlay it on the Gleaston Castle map; the candle arrangement matches the chapel quadrant. Click that room – find a gear-studded pedestal + note from Eli:
Four plinths must resonate as one. Seek Bishop’s Square.
Use the Ethereal Key on the underside of your counter – a new drawer slides out, revealing the Bishop’s Square device.
Visitors
Rebecca Rose (optional)
If alive, she returns with insight about resonance patterns. She teaches the Square’s alignment rule:
- Metal – Gem – Wood – Stone
- Each must emit one field: Aetheric – Diurnic – Mentic – Umbric.
Set four shelf items accordingly using the Lens. When all pulses sync, the Square activates. Result: Vault #3 (“Resonant Vault”) opens beneath the counter – retrieve a glowing orb (Astral Eye).
David Chafer – Elva Stone Follow-Up
Thanks you and leaves a sealed letter for Verona Green (read = side lore only).
Angus Eaton – Workshop Blueprints
Gives plans for shop upgrades (cosmetic) + tells you about a “whispering void in the cellar.” The void’s hum confirms you’ve unlocked access for tomorrow’s encounter.
Verona Green – Seraphel Mirror
Requests something to “reflect but not reveal.” Give her Seraphel Mirror. She becomes a powerful ally in the final act (needed for the true ending).
End of Day 12
Eli returns briefly and warns that something walks the catacombs. Unlocks the Wandering Shroud event chain for Day 13.
Day 13
Clue Card – “Shadow in Chains”
Overlay on Catacombs; the pattern matches the central corridor intersecting two crosses. Click and this triggers cutscene: a black mist forms – the Wandering Shroud.
The Sanity Trial (mini-boss puzzle)
To capture the Shroud, you must:
- Activate all four vaults (already done).
- Equip Lens; observe colour shifts: Umbric – Diurnic – Mentic – Aetheric.
- Quick-swap artifacts emitting those fields on the counter within 10 seconds.
Recommended set: Shadow Hold, Shield Charm, Voice of Cernunnos, Hunter’s Boon. Success: Shroud absorbed into Astral Eye and you get the Specter Tamed achievement.
Failure: temporary insanity. Play dice mini-game again to recover sanity and try again the next day.
Visitors
Eli White – Warning
If you failed the capture, Eli appears frustrated. If you succeeded, he congratulates you and explains that the Eye now links to the Catacombs core.
Simone Green – Lens Upgrade
Installs the final prism, allowing you to filter by field type using hotkeys (1-4). This makes artifact testing instant and grants the Master of Fields achievement.
Bonnie Robertson (if alive)
Returns remorseful and you can forgive or banish her. Here are the outcomes:
- Forgive: she later sacrifices herself to save Eli.
- Banish: alternate ending flag “Bonnie Gone.”
End of Day 13 Events
Nightmare sequence shows the Shroud inside a glass orb, whispering the word “Calaris.” This marks the transition into the late game, the Ritual arc and final endings.
Day 14
Clue Card – “The Pillar Awakens”
Overlay the card on the Catacombs map: the spiral motif matches the central lower chamber. Click it, you’ll find a carved pillar socket. Insert the Astral Eye to trigger faint humming. This begins the Ritual of Calaris questline.
Visitors
Eli White – Ritual Explanation
Explains that the Eye channels Calaris’ essence, and three factions want control:
- Eli’s Path (Pillar of Calaris): restore balance, neutral ending.
- Barton’s Path (Skull of Calaris): embrace forbidden knowledge, dark ending.
- Priesthood Path (Heart of Calaris: seal everything, sacrifice route.
He leaves the Ritual Map Fragment 1.
Verona Green – Supplies for the Ritual
Requests four items: Evocant, Seraphel Mirror, Fortinance, Ascus. Give them and she’ll craft the Calarian Seal for you the following day.
I you skip any, you lock yourself out of her faction later.
Simone Green – Lens Check
Shows a new waveform: Ethereal Field. You’ll need it tomorrow.
Rebecca Rose (If Alive)
Brings Ritual Map Fragment 2. Combine with Eli’s piece to reveal the Calarian Chamber – the final Catacombs room.
Evening Event
Use Lens on the central shop floor and see that a spiral symbol glows. Click and learn the Four Rays Mantra: “One Light for Mind, One for Body, One for Spirit, One for Soul.” You’ll repeat this tomorrow to open the Chamber.
Day 15
Clue Card – The Four Rays Puzzle
Return to the Catacombs central pillar. Use the Lens and rotate through the four fields until each ray pulses once:
- Mentic Field: Voice of Cernunnos
- Diurnic Field: Shield Charm
- Umbric Field: Shadow Hold
- Aetheric Field: Evocant
When all glow simultaneously, a portal opens. Enter and gain access to the Calarian Chamber and the Calarian Pedestal.
Visitors
Barton Potter
If he survived, Barton proposes the Skull Path, and you have two choices, with the following outcomes:
- Accept: dark ending setup; unlocks Skull Sigil item.
- Refuse: keeps you on Eli/Verona route.
Verona Green – Calarian Seal Delivered
If you gave her the four items yesterday, she returns with the Seal. You can insert it into the Chamber pedestal, which opens the side corridor leading to the hidden altar. Take the Heart of Calaris Shard (needed for Priesthood route).
Simone Green – Ritual Notes
Adds a fifth field: Corrupted Field (red) – appears only near cursed items. You’ll need to cleanse one tomorrow.
Bonnie Robertson (If Redeemed)
Appears to confess her sins, hands you Mary Bell Charm. It blocks one sanity loss in the final day.
Evening Event
Dream vision of four silhouettes. Depending on your choices so far, one stands closer – that’s your locked-in faction.
Day 16
Clue Card – “Light or Shadow, the Core Awaits.”
Points to the lowest chamber on the Catacombs map (beneath the previous spiral). Click it – descend into Calarian Core – four pedestals + central monolith.
Trial Flow
Each faction trial differs. You may attempt all, but completing one locks the ending:
Eli Route (Pillar of Calaris)
- Place Astral Eye, Shield Charm, Voice of Cernunnos, Fortinance.
- Order: Diurnic – Mentic – Aetheric – Umbric.
- Outcome: Eli channels the energy safely, destroying the Shroud; neutral “Balance Restored” ending.
- Achievement: Pillar of Calaris.
Barton Route (Skull of Calaris)
- Use Astral Eye, Skull Sigil, Corvan’s Might, Bonesguard.
- Order: Umbric – Corrupted – Diurnic – Mentic.
- Outcome: Barton absorbs Calaris and dies; player inherits dark power.
- Achievement: Forbidden Wisdom.
Priesthood Route (Heart of Calaris)
- Requires Heart of Calaris Shard + Verona alive.
- Place Shard, Seraphel Mirror, Ethereal Key, Grey’s Grace.
- Verona performs the sealing rite; both she and the Shroud vanish.
- Achievement: Heart Sealed.
Secret Route (Shopkeeper Ending)
- Only if you rescued Jupiter + redeemed Bonnie + kept Barton alive + Eli alive.
- Place Astral Eye alone, then interact with Jupiter on counter.
- Cat knocks the Eye into the void, collapsing the Chamber.
- Player awakens in shop – everything reset.
- Achievement: Endless Cycle + hidden “The True Shopkeeper.”
Evening Event
After the chosen ritual completes, the screen fades to white and the credits roll. Post-credits, you’re back in the shop; examine any artifact to trigger a subtle shimmer – the hint of NG+.
Day 17
Scene Setup
You awaken in Strange Antiquities. The shop looks normal, yet every shelf glows faintly – the telltale shimmer of Calaris’ residue.
Jupiter sits on the counter again, purring. If you achieved the Shopkeeper Ending, Eli is gone but a faint echo of his voice greets you: “You have not seen everything,” the voice says.
This signals NG+, where you can redo identifications with the upgraded Lens and finish any missed achievements.
Gameplay Changes
- Lens Filters: all five (Mentic, Diurnic, Umbric, Aetheric, Corrupted) unlocked at once.
- Books remain filled, but each entry now has a glowing rune – hovering over it triggers “re-verification” challenges.
- Thaumic Fields shift daily, forcing you to test old items under new resonance.
Visitors
Simone Green – Audit
She tasks you with confirming the identities of any ten artifacts under new field conditions. Use the Lens and align all five waveforms once per item. Completing this nets Thaumaturge Perfected.
Bonnie Robertson (if Alive)
Appears guilt-free, returns a box of cursed trinkets. Examine each with the Book of Curses:
- Mirror of Doubt – dispels once stared into.
- Spindle of Sleep – spin counter-clockwise thrice.
- Feather of Forgetfulness – burn gently in candle flame.
Finish all three and get the Curse Cleanser achievement.
Verona Green (if Sealed)
If she vanished during the Heart route, you’ll receive a note instead: “The seal holds. Remember me when the mirror clears.”
Reading it awards Echo of the Heart.
Barton Potter (if Alive)
Now human again, offers to document every identified object. Accept – adds the Encyclopedia Antiquitia, completing your archive. Achievement: Archivist Supreme.
Evening Event
Dream of Calaris fracturing into starlight, indicating the cycle’s permanent end.
Day 18
Objectives
This day runs indefinitely until all criteria for the Grand Completionist badge are met.
1. Re-Identify All Artifacts
Using the Lens, verify each item under all five field types. The moment every entry in Strange Objects displays five check-marks, the screen flashes gold.
2. Visit All Locations
Re-explore each unlocked map: Undermere (30 sites), Gleaston Castle (12 rooms), Catacombs (9 chambers). A new counter shows in the upper-left; hitting 100 % triggers World Walker.
3. Hidden Interactions
- Pet Jupiter again (30 times) – he drops a silver whisker; inspect it for Forever Feline.
- Ring the Bell 100 times – secret message “We hear you” – Customer Service Legend.
- Use Lens on Shop Sign – reveals inscription “Endless Cycle No More” – Closure.
4. Final Cutscene Trigger
Once all the above are complete, the shop lights dim. Eli says something, and the Screen fades to black and credits roll again, now with every symbol glowing.
Final Notes for Completionists
- Save before Day 14 if you want to see all endings without replaying the whole game.
- NG + Artifacts carry over, letting you skip up to Day 10 next cycle.
- Using the Lens on the credits screen reveals one last message. Make sure to check it out!
Wrapping up
And this is it! You have now completed the game and unlocked some of the most difficult achievements in the process. It was difficult, but fun.
And if you enjoy puzzles, I recommend checking out some of my other walkthrough guides for other top games: